

Showing posts with label Desserts. Show all posts
Showing posts with label Desserts. Show all posts
Monday, May 19, 2025
Monday, May 13, 2024

Monday, February 19, 2024

Monday, January 8, 2024

Monday, October 30, 2023
Layered Pumpkin Dessert

Would you care to join me for a yummy pumpkin dessert and some pumpkin chai tea?

Monday, May 1, 2023
"Clotted Cream" Filled Strawberries

Even though it felt like winter here over the weekend, it was perfect for taking pictures outside.
Monday, October 31, 2022
Pumpkin Delight and Easiest Taco Chicken

My group of friends from our fitness club had our Halloween luncheon and I brought this dessert.
Monday, October 10, 2022
Caramel Pecan Dream Bars and A Quick Stir Fry

I set a tea in front of my little waterfall because before too long I'll have to cover it.
Monday, July 11, 2022
Strawberry Dream Pie

We've had so many over 100 degree days so far this summer; I'm betting it'll be a record.
Monday, February 7, 2022
Monday, January 10, 2022
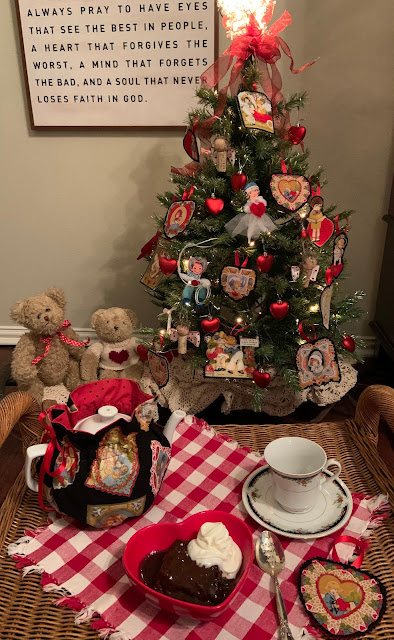
Happy Birthday to My Sister with Chocolate Molten Lava Cake

My sister is celebrating her birthday this week...her last one is her 50's!
Monday, September 27, 2021
Apple Crunch

I'm having my very favorite Apple Crunch today, which to me is even better than an apple pie!
Monday, June 14, 2021
Blueberry Delight

It's Flag Day and I'm having some Blueberry Delight to celebrate. This dessert would also be wonderful for the 4th of July!
Monday, April 19, 2021
Easy Apple Strudel

It turned rather chilly here in Texas, and my tea is inside today. I've baked us an easy apple strudel, if you liked to try a slice.

I'm using another trio set that my late Great Aunt Kitty painted.

I found this Susan Paley vase on ebay and her name is Serena. She was only $3.99, but the shipping was over $10.00. I went back recently to check on others, and she was $45.00!! I'm thinking that I got a good deal!! I did the cross stitch several years ago.

My strudel was placed upon this beautiful serving dish that my youngest son and daughter-in-law gave me for my birthday. I have two other pieces similar to this that they gave me.

This company will inscribe a message on the back, which makes it so personal.

The strudel is placed upon this most delicate tablecloth that I believe was my Aunt Kitty's.

This is the border on the tablecloth. All the white parts are hand embroidered. I so wish I could ask where this came from. My Aunt Kitty and Uncle John didn't have children and they traveled a lot. Aunt Kitty was like a grandmother to me, since her sister, my grandmother died when I was probably 3-4 years of age.
Yield: 6

Easy Apple Strudel
This is a great recipe to have on hand when you need something easy but impressive.
Ingredients
- 1/2 pkg. Frozen Puff Pastry (1 sheet)
- 1 egg
- 1 tablespoon water
- 1 can apple pie filling
- 1 teaspoon cinnamon (or to taste)
- a few gratings of fresh nutmeg (if desired)
Instructions
- Thaw pastry at room temperature for 3o minutes.
- Preheat oven to 375 degrees.
- Mix egg and water and set aside.
- Unfold pastry on lightly floured surface. Roll into a 16"x12" rectangle.
- Cut up the apples with kitchen shears to make smaller pieces. Add the cinnamon and nutmeg.
- With short side facing you, spoon the pie filling on the bottom half of the pastry to within 1" of edges.
- Starting at short side, roll up like a jelly roll. Place seam side down on a parchment lined baking sheet. Tuck the ends under to seal. Brush with egg mixture. Cut several 2" long slits 2" apart on top.
- Bake for 35 minutes or until golden.
- Cool on baking sheet on wire rack for 30 minutes.
- Slice and serve warm .
Notes:
I sprinkled the top of the strudel with some sparkling sugar before baking. Serve with ice cream or whipped cream.
Thank you for visiting! xo

I am sharing this with:

Monday, April 5, 2021
Watergate Salad

Happy Easter Monday! It's warm enough for tea and treats in the garden today. My lady vase is sporting some pansies from my window box, along with some Dusty Miller. Being not ready to put my Easter decor away yet, my rattan bunny has joined the table.

Isn't this tea set with the pansies on it, and the sweet message, perfect for Springtime? it was sent to me from a dear friend awhile back, and it has another teacup with it.
Yield: 8-10

Watergate Salad
This recipe is more like a dessert, and is quite retro. A bit of information was found on seriouseats.com on how the recipe was named. It seems that Kraft Foods introduced pistachio pudding in the 1970's and promoted a recipe called Pistachio Pineapple Delight. However, a food editor at a Chicago newspaper reprinted therecipe, but named it "Watergate Salad", and the name stuck!
Ingredients
- 1-3 oz. pkg. pistachio instant pudding mix
- 1-20 oz. can crushed pineapple, not drained
- 1-8 oz. container frozen whipped topping, thawed
- 1 cup mini marshmallows
- 1/2 cup chopped nuts
Instructions
- Mix the pudding mix into the pineapple. Fold in whipped topping, and add the marshmallows and nuts. Chill.
Thank you for your visit! xo
I am sharing with:
Monday, February 1, 2021
Creme Brûlée

When I first started my blog, with the help and encouragement of my darling daughter, back in 2011, I posted this favorite recipe, and I'd like to share again. It really is so good, and perfect for Valentine's Day.

Several years ago, some dear friends of mine gifted me this beautiful tea set that came with six teacups, the creamer and sugar and tea bag caddies. Isn't it perfect for Valentine's Day?

The teacup is shaped so beautifully.

My ever faithful lady head vase is being used to root some grape ivy right now, and I stuck a faux rose in to brighten her up.

My friend, Marla, hand stitched two of these too- pretty-to-use coasters for me last year.
Yield: The recipe states 6, but I get 11-12, and even when making half a recipe, I get 5

Creme Brûlée
This recipe is simply the best, and people that try it are so impressed by it.
Ingredients
- 9 egg yolks
- 3/4 cup superfine white sugar (I just use regular sugar)
- 1 quart heavy cream
- 1 vanilla bean (I use 1 tablespoon of vanilla bean paste when I don't have a vanilla bean, or vanilla extract)
Instructions
- Preheat oven to 325 degrees.
- In a large bowl cream together the egg yolks and sugar with a whisk until the mixture is pale yellow and thick. ( I use my mixer to do this.)
- Pour cream into a medium saucepan over low heat. Using a paring knife, split the vanilla bean down the middle, scrap out the seeds and add them to saucepan (or add the vanilla bean paste at this time).
- Bring cream to a brief simmer, do not boil or it will overflow. Remove from heat and temper the yolks by gradually whisking the hot vanilla cream into yolk and sugar mixture. Do not add cream too quickly or the eggs will cook.
- Divide custard into ramekins, about 3/4 full. Place ramekins into a roasting pan or large cake pan, and fill pan with enough hot water to come halfway up the sides of the ramekins.
- Bake until the creme brûlée is set, but still a little wiggly in the center, about 40 minutes. You may want to cover loosely with foil to prevent browning. Remove from oven and cool to room temperature. Transfer the ramekins to the refrigerator and chill for 2 hours.
- Right before serving, sprinkle each with 1 tablespoon sugar. Hold a kitchen torch 2 inches above the surface to brown the sugar to form a crust. Garnish with fresh fruit, if desired. Serve at once.
Notes:
You can also put the sugared creme brûlées under the broiler and watch very carefully.
I keep these creme brûlées, covered, in my fridge for several days, and they are still wonderful. Just remember to torch them just before serving.
Thank you for your visit! xo
Keep In Touch
Full Plate
All About Home with Debra
All About Home with Amber
Love Your Creativity Link Party
Meal Plan Monday
Monday, October 5, 2020
Apple Crisp

Let's enjoy some delicious apple crisp on this beautiful Fall day! I'm using my Sadler Brown Betty teapot and my late beloved mom's picnic tablecloth.

I always like getting out my apple candle in the Fall and put it on an upside down teacup and then the saucer to hold the candle.

This is another favorite Fall teacup, which is Johnson Brothers Harvest Time. I am having some Holiday Apple Frost Tea from my friend, Joy.
Yield: 6

Apple Crisp
This recipe is from my friend Debbie, who recently shared it with me.
Thanks, Debbie! It's a perfect Fall dessert.
Ingredients
- 4 cups sliced tart apples (about 4 medium)
- 2/3 -3/4 cup brown sugar
- 1/2 cup flour
- 1/2 cup oats
- 3/4 teaspoon cinnamon
- 3/4 teaspoon nutmeg
- 1/3 cup butter, softened
Instructions
- Heat oven to 375 degrees.
- Arrange apples in greased 8x8" square pan.
- Mix remaining ingredients together and sprinkle over the apples.
- Bake until topping is a golden brown and apples are tender, about 30 minutes (mine took 55 minutes).
- Serve warm with ice cream, cream, or whipped cream.
Thank you for your visit! xo
I am sharing this with:
Monday, July 20, 2020
Our Paris Tea and Swan Cream Puffs

When Ella and I started our teas this summer, she had said that she wanted to have a Paris tea, because she wants to go there someday, and also she had an Eiffel Tower light up decoration that she wanted to bring. She also had her outfit planned that she wanted to wear! We first had our charcuterie board as an appetizer, along with lemon water in my grandmother's stemware.


Ella also wanted some raspberries with whipped cream to accompany our baguettes on my snack trays.

For dessert, I made pate et choux shells ahead of time, and froze them, and then pulled them out to thaw on the day of our tea. I then made them crispy by putting them in my toaster oven, and then cooled them before filling them.

Ella had chosen this Royal Albert Duchess teacup, ahead of time. Tres elegant, n'est-ce pas?

I chose this Royal Albert Provincial Flowers, Violet teacup, that a friend had given me from her late mother's collection.

Ella set the timer on my iPhone (kids know how to do everything!) to take our picture before we started our dessert of the swan cream puffs. Getting dressed up is fun for both of us. Our dessert tea was, of course, Paris tea by Harney and Sons...delicious! We may never get to Paris, but at least we can drink it!!
We appreciate you visiting our Paris Tea...Merci beaucoup!
Congratulations to Rita, of Panoply who is the winner of Biblical Minimalism ! Thank you to all those who entered!
Yield: 10-12
")
Cream Puffs (Swans)
My late beloved hubby loved cream puffs, and I always think of him when I make them. My mom made them when I was growing up, and I think of her, too.
Ingredients:
- Cream Puff Shells:
- 1 cup water
- 1/2 cup butter
- 1 cup flour
- 4 eggs
- Filling:
- 1 package of instant vanilla pudding
- 1 and 1/2 cups milk
- half of an 8-ounce container of frozen whipped topping, thawed
Instructions:
- For Cream Puff Shells:
- Heat oven to 400 degrees.
- Heat water and butter to rolling boil. Stir in flour. Stir vigorously over low heat for about 1 minute, or until it forms a ball. Remove from heat and let stand for a few minutes.
- Beat in eggs, all at one time, and beat until mixture is smooth and very stiff. If you prefer, you can do this in an electric mixer.
- Drop by scant 1/4 cupfuls (an ice cream scoop works well), onto a parchment lined baking sheet, 3" apart.
- Bake 35-40 minutes or until puffed and golden. Cool , and cut a small vent on the side towards the top, to let out steam.
- Cut off tops. Pull out any filaments of soft dough. Fill puffs with the filling.
- Filling:
- Mix pudding and milk together and whisk for 2 minutes. Fold in the thawed whipped topping. Fill the cream puffs, and replace the tops. Sprinkle with powdered sugar, using a small sieve.
- To make the Swans:
- Pipe a question mark design, or a #2 onto the baking sheet. These will brown in about 15 minutes. Take these out while the cream puffs finish baking. Cut the top of the cream puff shell in half, for the wings. Fill the bottom of the shell with the filling, fan the two halves of the top out to resemble wing, inserting into the pudding. Put the swan's neck in the front and there you have it...a beautiful cream puff swan!!
Meal Plan Monday
Subscribe to:
Posts (Atom)
